Thank you for taking the time to go through this course!
Due to technical requirements, we cannot provide you with a lab environment to run the notebooks. However, in this document, we’ll walk you step-by-step on how to set up Google Cloud, and do multimodal prompting with Gemini models via VertexAI on your own. This is completely optional. You can learn to use Gemini by simply viewing the course.
💻 You can access the official github repository of this course from here.
The github repository contains:
NOTE: The steps below will walk you through how to set up your Google Cloud account to run these notebooks ONLY as Colabs.
Go to Google Cloud and sign in with your Gmail account. You will need to create a Gmail account if you don’t already have one.
If this is your first time on Google Cloud, you’ll be asked to set up billing. A cloud billing account is used to define who pays for a given set of resources, and it can be linked to one or more projects. Project usage is charged to the linked Cloud Billing account (more about Projects below).
In order to run the notebooks for this course, you need to activate your billing. You can do it at this point by following the instructions provided on Google Cloud or later in the steps below.
Running the colab notebooks in this course will result in you being billed for the API services. You will be responsible for the costs incurred. We have converted to markdown the costly examples (generally the large video examples) and the total charges to your account should be less than one USD for a single pass through the notebooks. The Vertex API costs are described here.
👉 If you are a new user on Google Cloud, there’s a 90-day free trial with a $300 credit which would be more than sufficient to run all the notebooks for this course.
Google Cloud projects form the basis for creating, enabling, and using all Google Cloud services including managing APIs, enabling billing, adding and removing collaborators, and managing permissions for Google Cloud resources. Your usage of Google Cloud tools is always associated with a project.
Go to your Google Cloud Console.
Create a new Project. Click the arrow (in red), then click New Project (in blue).
Give your Project a name.
You can give any name you want, but it is recommended to use “DLAI-shortcourse-on-gemini” so that you can run the Google Colabs without changing anything in the code.
Your Project ID will automatically display under the text box (red). Save that Project ID somewhere as it will be later used in running the Google Colabs. Once created, your Project ID cannot be changed.
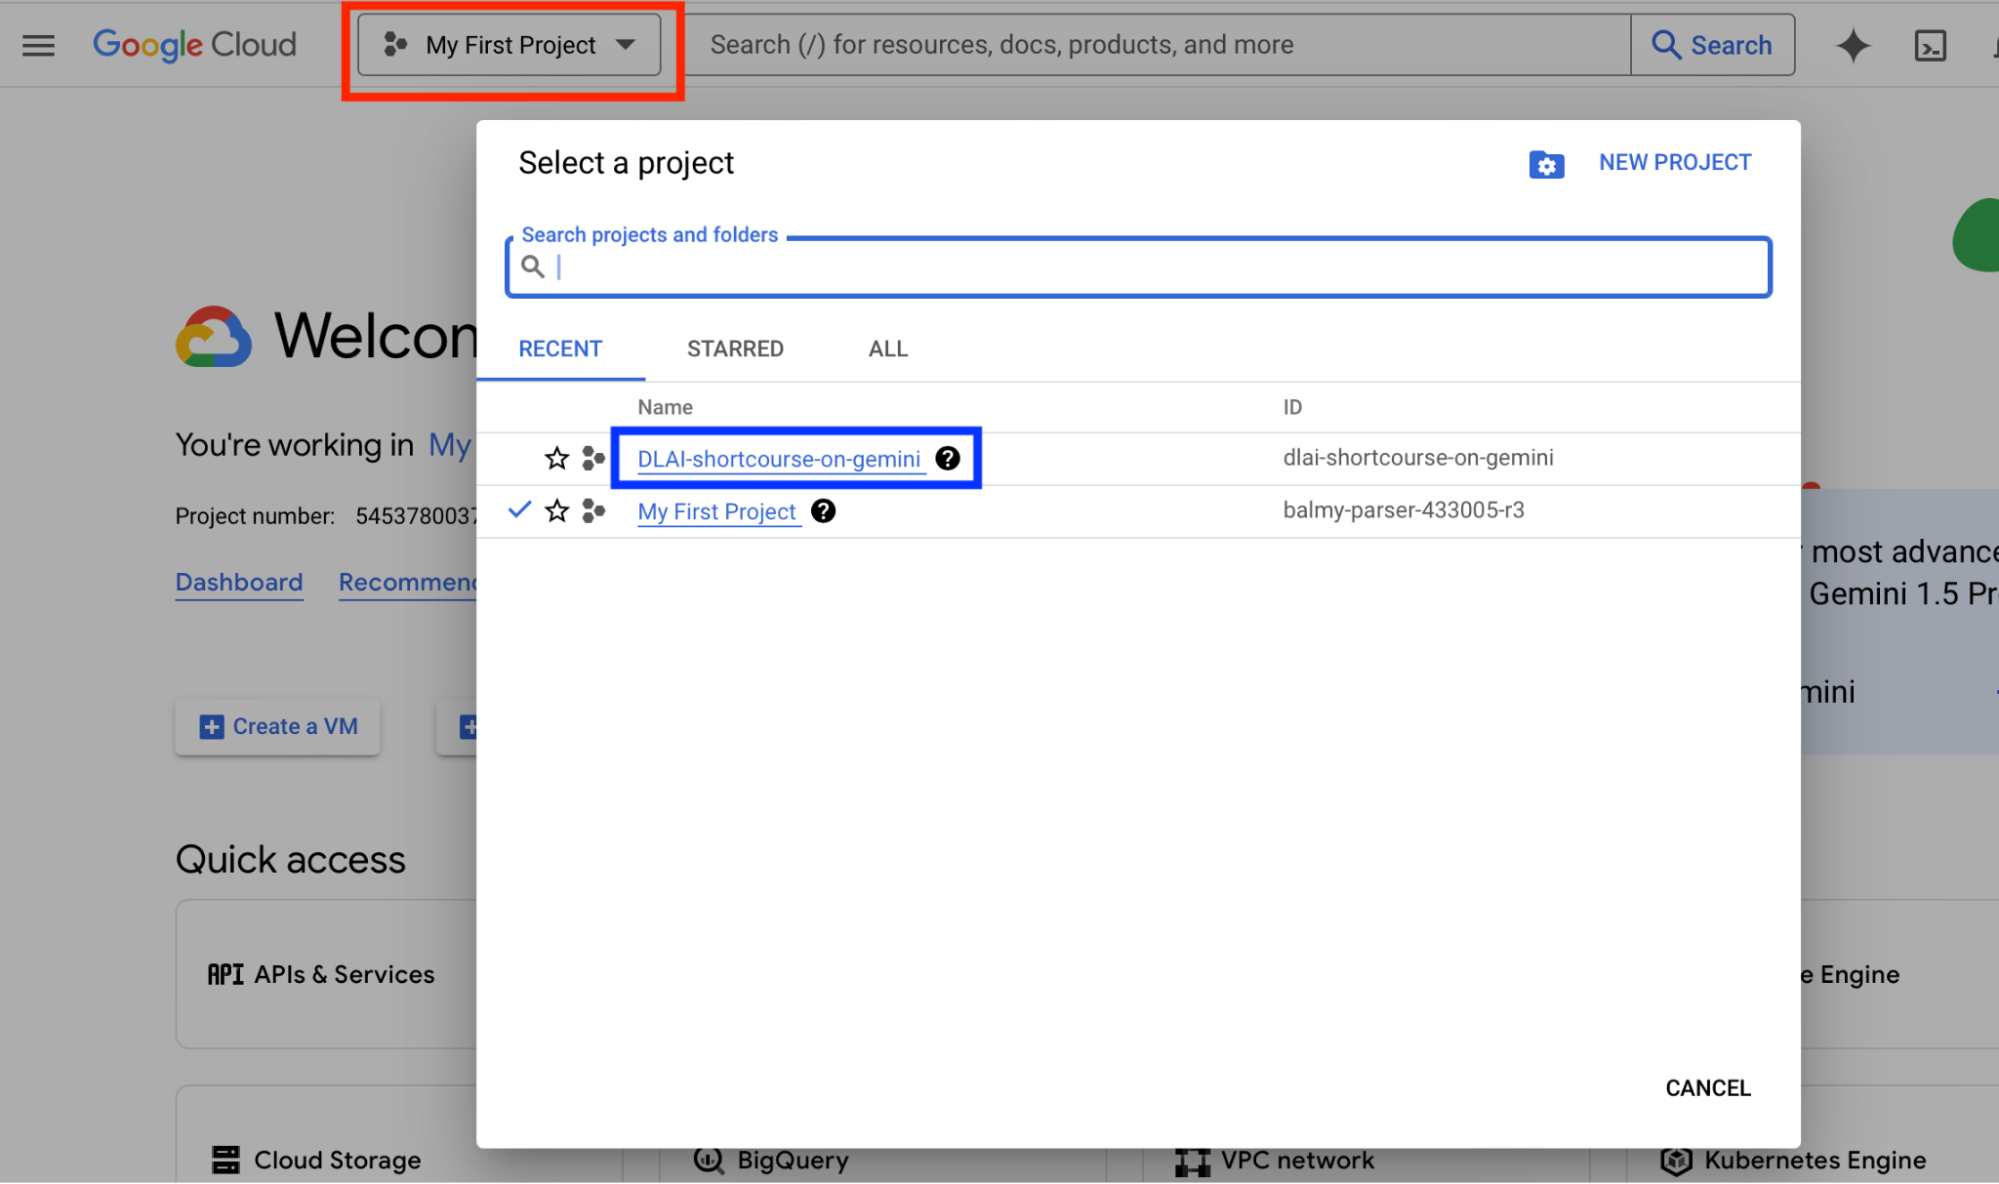
After your Project has been created, select it by clicking the arrow (in red).
Once your Project has been selected, you should see it being displayed in the box. This would mean that this is your current selected Project.
You need to make sure you are inside the correct project for the next steps.
You will now enable the APIs that are needed.
From the search bar, find Enabled APIs & services.
Next, click on + ENABLE APIS AND SERVICES.
In the search bar, look for Vertex AI.
And select Vertex AI API.
Enable Vertex AI API.
If you didn’t enable billing previously, clicking the ENABLE button will prompt you to do so now. You cannot use Vertex AI API without enabling billing.
Follow the steps to create your Billing Account.
Once the Vertex AI API is enabled, it is now time to test it.
Final steps! Test to see if your Vertex AI API is working.
In the search bar, find Vertex AI.
From the left hand menu, select Prompt Gallery.
Then first select, Text (in red) and then click on Ad copy (in blue):
Run (in red) the text prompt (you might see a different prompt):
If your execution is successful, you should see a response without any errors. Great!
Next, go back to the previous page by clicking the “back arrow” as shown in the screenshot above (in the top left corner, in blue).
If a pop up shows up when you click back, you can continue without saving.
Lastly, follow the same steps to do a video prompt. Deselect Text first, then select Video (in red) and then click Ad copy from video (in blue):
Run the video prompt as described above (in the text prompt). If your execution is successful, you should see a response without any errors.
Now you are all set to run the notebooks!
For the next part, follow the instructions provided in the Google Colabs of each lesson. Those instructions will guide you through authenticating your notebooks with Google services and downloading any supplementary files needed in running them.
Be sure to use your Project ID (which you created above) when asked. In our case, we used (“dlai-shortcourse-on-gemini”):
PROJECT_ID = "dlai-shortcourse-on-gemini" # @param {type:"string"}
LOCATION = "us-central1" # @param {type:"string"}
import vertexai
vertexai.init(project=PROJECT_ID, location=LOCATION)